


Camtasia Studio helps you record your computer screen and then turn those recordings into professional-grade videos. It is such a great editing software for “common” people, although you will find the incompatibility problem while Playing Camtasia Videos through Mac OS Sierra, Cannot view Camtasia Videos on Mac OS X El Capitan…When we need to enjoy recording camtasia videos with players on Mac or Windows, like iMovie, QuickTime player, Windows Media Player, we have to convert amtasia to avi, wmv, mp4 format for these players. So, you may need this guide.
In addition, you can also do some simple editing work with it, such as combining several Camtasia Video clips into one for easy importing/editing in Sony Vegas, trimming videos, deinterlacing 1080i videos, adding text/image/video as watermarks to your original files, replacing audio tracks, adjusting brightness/contast/saturation of the imported files, etc. Here, this guide will show you how to convert Camtasia Videos on macOS Sierra.

Camtasia for Mac File Formats:
Camtasia project files (.cmproj): Saves a copy of the recordings, library files, and edits completed within one file. When you save a project, enable the “Create standalone project” option to include all source files within a project to allow you to share the project with other Camtasia for Mac users.
Camtasia recording files (.cmrec): Screen recording file recorded with Camtasia for Mac. The recording files may also include audio and camera video. Recording files are automatically saved to Users > Movies > Camtasia temporary recordings folder. You can apply SmartFocus and Window Spotlight effects to Camtasia recording files.
Best Mac Camtasia Video Converter:
Here, Pavtube iMedia Converter for Mac < review> has the top ability to convert Camtasia video files to other common video formats with high quality, like MPEG, MPG, FLV, VOB, SWF, MKV, WMV, MOV, 3GP, TS, M2TS, etc. If you are a Windows user, I recommend you to use the Windows version: Camtasia Video Converter for Windows to convert Camtasia video to editing in Final Cut Express, Final Cut Pro and iMovie. The following is the step-by-step guide on how to Convert Camtasia Video file on Mac OS Sierra.
Features of the Top Mac Camtasia Video Converter:
- Convert Camtasia Videos to MP4, H.265, AVI, WMV, MOV, MKV, MOV, H.264, MPG and more.
- Convert Camtasia Videos for uploading to YouTube, Vimeo, Facebook, etc.
- Make Camtasia Videos compatible with portable devices, like iPad, iPhone, iPod, QuickTime, Apple TV, Windows Media Player, Xbox one, Xbox 360, PS3, PS4, Android phone or tablets, Windows Phone or tablets and more popular devices.
- Convert Camtasia Video files to popular editors like FCP, iMovie, Avid Media Composer, FCE, Premiere Pro, Windows Movie Make, Sony Vegas Pro, DaVinci Resolve etc
- Fully compatible with both Windows and Mac
- You can also get MXF/MTS/AVI/FLV/MP4 in Affect Effects CC with Best Quality
Download and install the Mac Camtasia Video Converter:


Step-by-Step Guide on Convertting Camtasia Video Files on Mac OS Sierra
Step 1: Load Camtasia Video Files. Click “Add file” button to load the files like AVCHD, all MP4, MKV, FLV, all SWF, MPEG-2, VOB, MXF, MPG, MOD, WEBM files which are needed to convert Camtasia Video to Mac OS Sierra.
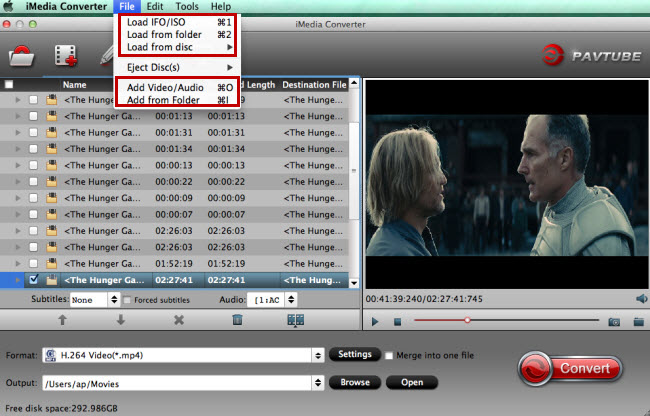
Step 2. Choose MOV as output format > Click Format to choose “Common Video -> MOV – QuickTime (*.mov)” profile in the drop-down menu.

Tips: The default settings may not satisfy you, and you can click the “Settings” button to change the settings by yourself including video resolution, bit rate, audio sample rate, audio channel etc. for full screen playback smoothly. Or keep no changes, which is also a good choice.
Step 3. Click the “Convert” button on the main interface and the software will start to convert Camtasia Recording File .camrec to friendly video formats immediately. When the conversion finishes, click “Open” to find the converted video files.
Learn The Toturial Guide About Similar Editing Software – FCP & Adobe Premiere Pro Tips >> Convert AVI/WMV/VOB/FLV files to FCP X | Import YouTube Video to FCP | Convert G2M WMV to Moviemaker, Camtasia, FCP and Vimeo | Rip Blu-ray to Final Cut Pro for Editing | Rip DVD to Final Cut Pro X | Import 4K H.265 Video to Premiere Pro CC | Rip Blu-ray/DVD File to Adobe Premiere Pro
How to Create Video with Camtasia – Produce Camtasia Video as an mp4 file (Mac)
When you have completed recording and editing your video project in Camtasia, you will need to produce a shareable mp4 video. The mp4 video file is a standard video format this is compatible with RIT’s streaming media server and myCourses.
Below are the steps for producing an mp4 file using Camtasia Studio.
Step-by-step guide
- After your have recorded and edited your project, select Share from the Camtasia>Export from the Camtasia Studio toolbar.

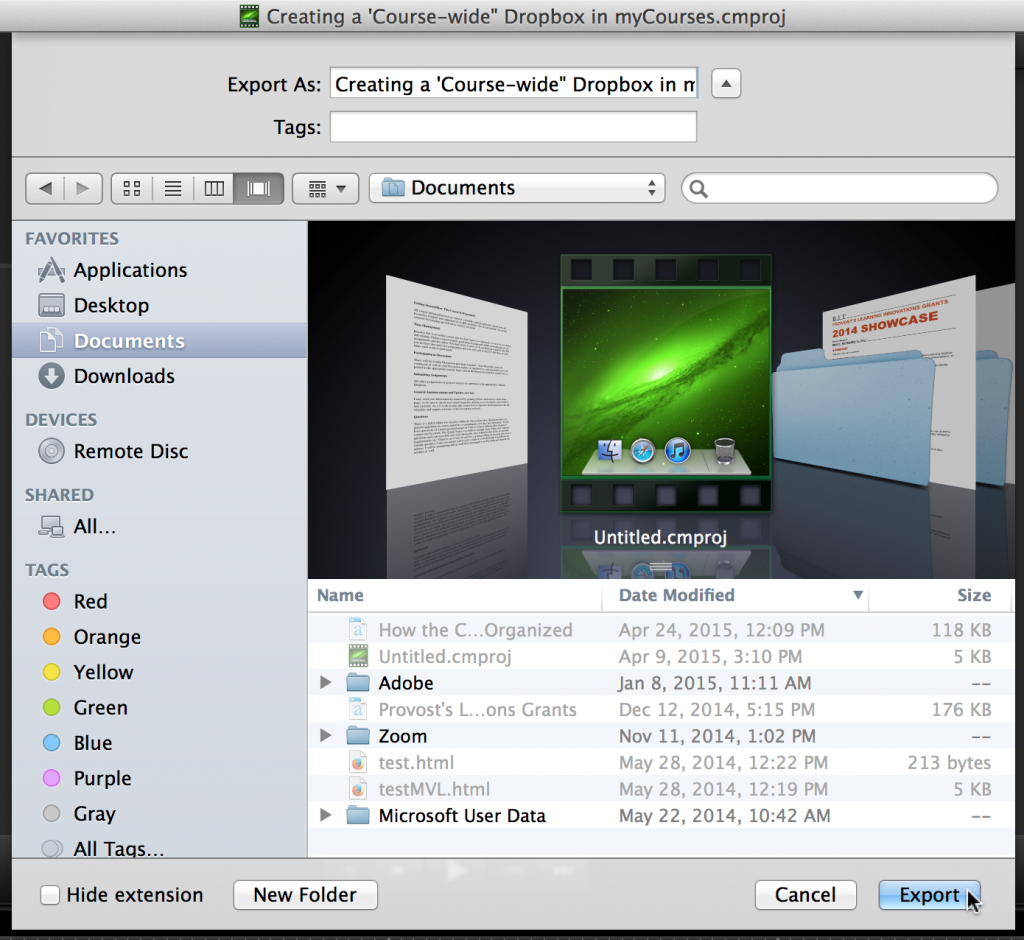
- Enter a name for your video file and select the folder you would like to save your file to.
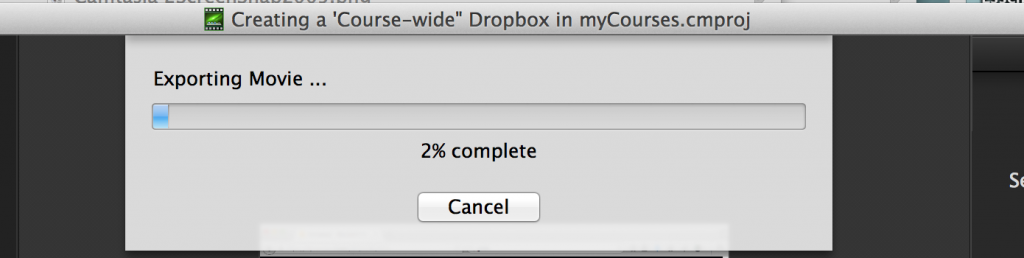
- Your video will begin to render, this process can be lengthy and depends on the speed of your computer. Camtasia will display a progress bar so that you monitor the process.
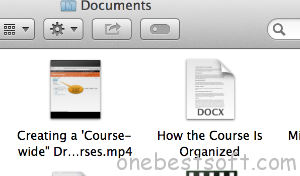
- Once complete your mp4 video file will appear in the folder you specified. Next, you can insert this video into myCourses and the RIT streaming media server.
Source: https://wiki.rit.edu/pages/viewpage.action?pageId=113609452
Now you may successfully edit your Camtasia Videso through Mac OS Sierra without the annoying problems.


