


YouTube has been designed to only allow users to watch and view videos on their website. Many users want to save their favorite videos to their computer and then transfer to a Projector so they can watch them without being connected to the Internet. Below are the steps required for watching downloaded YouTube videos on your Projector freely.
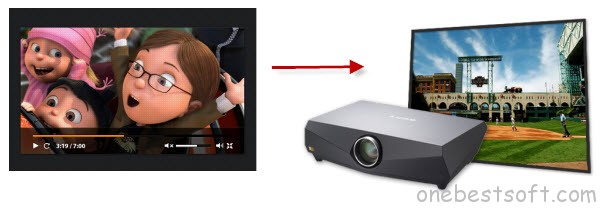
The process of doing any of those things sounds simple enough: find a video on YouTube, download it, and upload it to your device. Unfortunately, it doesn’t happen quite so smoothly, as YouTube videos in flv format it may be using a codec and format that the projector doesn’t recognize. Then You may have come across the issue before where you’ve downloaded a video, uploaded it to your projector, opened the file and clicked play, only to stare at a blank screen, a dark picture with sound, or nothing at all.
- Read common solution to fix YouTube Videos Not Playing Problem
So what’s the answer? Hunting down a YouTube conversion tool would be a good start, and luckily here, Pavtube Video Converter Ultimate is exactly made for you to fix this issue, for it can aid you to easily convert downloaded video clips even in 720P, 1080P, 4K HD from YouTube to Projector accepted video format like MP4 with blistering speed and meanwhile keeping maximum high quality. The mac version is here. Now just download it and follow the tutorial below.
Watch video clips from Youtube on a Projector
1. Click the “Add video” icon to import the downloaded YouTube video correspondingly.
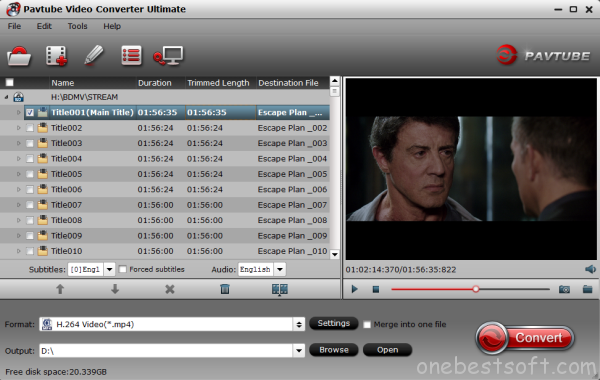
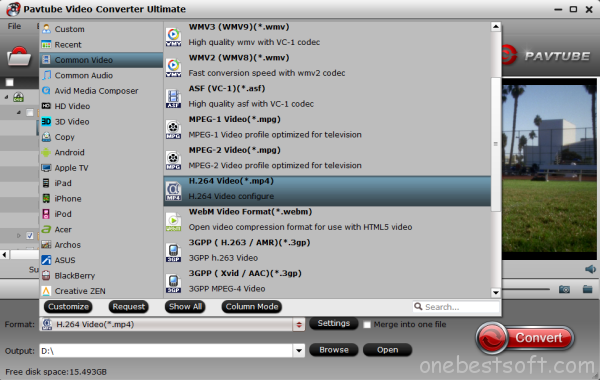
2. Click the drop-down list on the bottom; choose proper presets according to your Projector. Basically the “H.264 Video(*.mp4)” is a universal format for Projector. MKV or AVI maybe OK, it will all depend on the projector you have. Also you can convert YouTube video for enjoying on iPad Air, MP3 player or other portable devices.
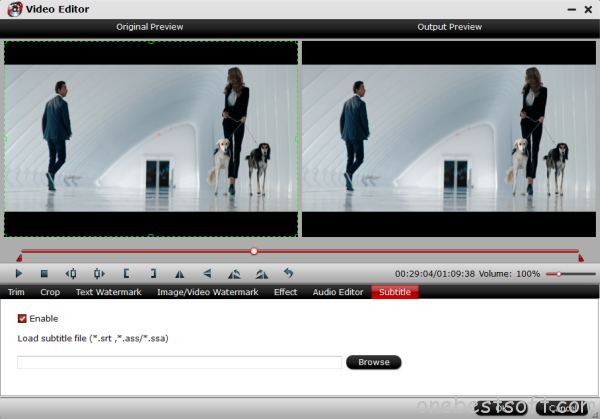
3. Check the pencil-like icon to activate the editing function. Here you can trim video for your needed length, crop video to get rid of annoying black edges, add text/image watermark and add subtitles.
For example, if you want to get video clips from Youtube along with English subtitles, and the original movie has no subtitle or the subtitles you need, you can download it from website and then add the subtitles into the output videos for full enjoyment with this software.
4. For some advances users, you can go to adjust video and audio parameters like bitrate, resolution, channels, etc. Click “Settings” button you can go to check and change them as you like.
Pls notes that the video quality improved with the bitrate, but not the higher the better. You need to consider your device configuration as the high bitrate required higher read&write speed.
5. Ok now click the “Convert” button to start converting for playing YouTube Movie Clips on a Projector.
It supports batch conversion, you can import and transcode multiple YouTube videos at one time. After conversion, click “Open” to locate the converted video directly. Transfer the result video file to your a Projector for enjoying. Don’t know how to hook up Your Laptop to a Video Projector? You can view the post here.
Overall, Pavtube Video Converter Ultimate is an all-in-one ideal app to help you not only convert YouTube videos, but also rip Blu-ray, DVD to almost any common video format such as VOB, FLV, WMV, AVI, MKV for mirroring your PC monitor onto a Multimedia Projector or backup the BD, DVD keeping the whole movie structure as you need. It’s worth of buying. Have a try now!


