


We all like the the laptop: lighter, powerful functions, convenient, you can take it to anywhere, anytime, when you are going on a trip, having a meting, staying in bed, on a car. Mention the laptop, flash drives or thumb drives is the best partner of laptop, which can save the videos, ppt files, images, music files, etc. Even you take the laptop to some places where has no any internet, you still can easily move files from one device to another when you don’t have the option of sharing a network or when the files you want to share are too big to attach to an email message. This post will tell you how to transfer files from flash drive to laptop.
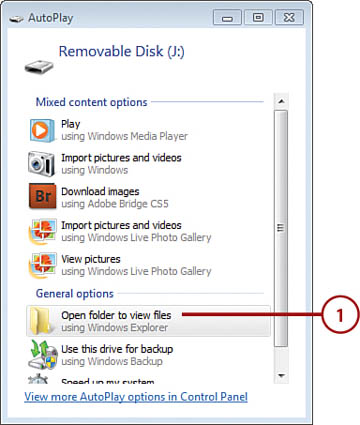
Step 1. When you first connect the flash drive to your USB port, Windows OS automatically senses the addition and displays the AutoPlay dialog box so that you can tell the program what to do next.
Step 2. Click Open Folder to View Files.
Step 3. In Windows Explorer, select the file(s) you want to transfer.

Step 4. Click a folder arrow to locate the subfolder you want to use to store the file(s).
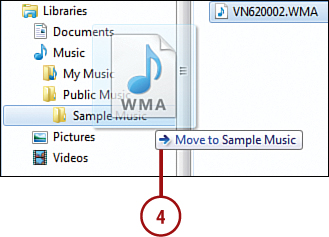
Step 5. To move the file, press and hold the Shift key and drag it to the folder.
Wait for A Minute: You can do these and get the better falsh service
*Selecting Multiple Files
- You can drag the video file to the flash drive one by one
- Also you don’t have to move files one by one. Just select all the files on the flash drive, press Ctrl+A.
- Choose a couple of the files that happen to be next to each other, click the first file you want, press and hold Shift, and click the last file in the set you want to move.
- Choose different files on the flash drive that are not beside each other, press and hold Ctrl and click each file you want to move.
*Copy DVD and Blu-ray movies to flash drive
When you want to transfer the DVD and Blu-ray movies to your falsh drive, you can’t drag the videos to falsh drive directly due to the complicated DVD or Blu-ray structure, you need one DVD ripper or Blu-ray ripper which can provide you the poplar video formats, you can use the MakeMKV, Handbrake, they are all the perfect tool. Here, we take the Pavtube Video Converter Ultimate for example , you can import the DVDs, Blu-rays to this software and output any videos you want, 300+ video formats are enough for you.
1. Click "File" drop-down option, you can load the DVD and Blu-ray disc to it, at the same time, you also can import the DVD and Blu-ray ISO images, folder to it.
2. Click the Format button, you can choose one video format you want, for example:
- Convert DVD to MP4, DVD to AVI, DVD to MKV, DVD to MOV, DVD to H.264, etc,
- Convert Blu-ray to MP4, Blu-ray to AVI, Blu-ray to MKV, Blu-ray to MOV, Blu-ray to H.264, Blu-ray to H.265, Blu-ray to WMV, etc.
- Convert the 2D DVD videos to 3D video: 3 3D MP4/MKV/MOV/AVI/WMV.
- Choose the TVs preset when you want to play the video from the USB, like the DVD movies on LG TV, Samsung TV, Apple TV, etc. More options are waiting for you to explore.
3. Click the Convert button to start the video converision.
*Compressing Many Files
You also can compress the video for smaller video size, above video converter cab do this for you, you just need to enter the Settings and reduce the video frame, video bitrate, or adjust other video parameters. You also can take full use of the built-in video editor, you can split the videos into some smaller clips, or trim the videos, remove the clips you don’t want. Of course, you can convert the video to videos for smaller video size.
When you’re ready to remove the flash drive, you can remove the flash drive from PC, but it’s not as easy as you image, you need do the right steps and get rid of the virus risk
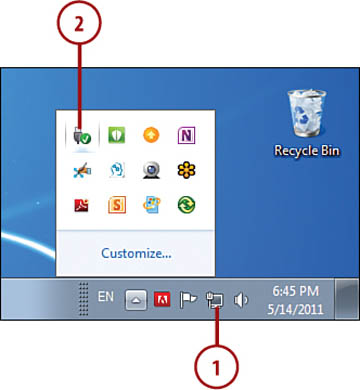
Step 6. Click the Show Hidden Icons arrow in the notification area.
Step 7. Click the Safely Remove Hardware icon.
Step 8. Click the flash drive in the list.
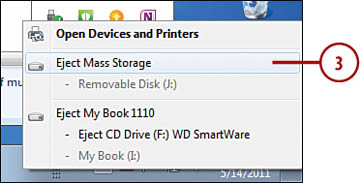
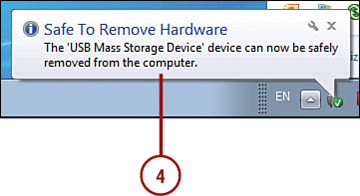
Step 9. When you see the Safe to Remove Hardware message, remove the flash drive.
it’s so easy to do, you just need to follow above steps, you can import the eject the flash drive from PC safety. Hope you can enjoy the happy flash drive usage. You can refer to this: U disc vs USB flash drive and choose desired video storage way
Flash Drive Generation |
Description |
| First | Flash drives were first prepared for commercial sale in 2000, and had a storage capacity of only a few MB. This first generation of flash drives was a revolution in portable storage for its time, but was quickly eclipsed in terms of functionality and storage capacity. |
| Second (USB 2.0) | The second generation of USB flash drives offers vastly improved transfer rates and significantly greater storage capacities than the first wave. Upper-end flash 2.0 drives are capable of writing data at nearly 20 times the rate of the earliest units, and are able to store several GB instead of MB. |
| Third (USB 3.0) | USB 3.0 flash drives again offer a marked increase in storage capacity and transfer rate over their predecessors, and are able to read and write data at approximately 10 times the rate of 2.0. |


