Sometimes, we will often have the needs to split a large video into small clips as the condition in the following parts:
1. I have a large H.264 file (4.93GB) and I need to split it into two smaller H.264 files to put on two DVDs.
2. I needed to cut out 100 mb that didn’t go into disc. There are many programs helping to do that, but they requires to recode film – it takes several hours.
3. I have a Camera that I use for home movies and it gets filled up. I want to take each of those files and split them into separate clips, but have been unable to find a way to do it as of yet.
How do people wish to split large files?
From above listed 3 conditions, we can see that people often have different requirements on the ways that you split large video. Some wish to split a large video into only two parts, others prefer to cut the video into various small clips, there are still some people wish to precisely split the video from certain point and also split without format encoding process. Based on those requirements, we have picked two good video splitter program – Pavtube Media Magician and Pavtube Video Converter Ultimate for you, the following part will show you how to split large video with those two programs in different ways.
Part 1: Precisely split video with Pavtube Media Magician
Part 2: Simple split video into many small clips with Pavtube Video Converter Ultimate.
Part 1: Precisely split video with Pavtube Media Magician
Pavtube Media Magician (get Mac version) is a remarkable video splitter program which allows you import various camera formats such as MTS/M2TS/MXF/TOD/MOD/MOV and also various digital file formats including AVI, Divx, WMV, MP4, MKV, M4V, FLV, F4V, etc. With the program, you can accurately split video frame by frame on the timeline. If you import MTS/M2TS/TOD/MOD with the same codec and you don’t want to loss any quality, just choose to output “original” format so that you can complete the video splitting process without any format conversion process.
Step by Step to Split Large Video Precisely without Re-encoding with Media Magician
Step 1: Load MTS/M2TS/TOD/MOD clips into the program.
There are two ways available for loading source media files:
1) Import from camera/camcorder
Connect your camera/camcorder with your PC and run Pavtube Media Magician. The program will detect your camera or camcorder automatically and ask “Camcorder is connected. Are you ready to launch wizard now?” Click “Yes” to confirm. In the mean time, you are allowed to backup the source footage directly from camera to local computer. Also, you can click the camera icon to load camcorder videos as well.
2) Import from local computer
If you have already stored MTS/M2TS/MOD/TOD clips on the hard disk drive of your PC, you can choose to “Import Media Files” or “Import Media Folder” to browse and load source files from the path that contains the source files.

Step 2: Drag and drop the source files onto Timeline.
After source MTS/M2TS/MOD/TOD clips are imported into the program, you can directly drag and drop the clips that you want to do frame accurate splitting onto timeline. To select multiple clips on list, you can press Command Key and click.

Step 3: Split/Cut/Trim MTS video by frames accurately
On the preview window, you can use Frame Selection Controller to seek to the corresponding frame of the current image, or seek the previous frame/next frame for locating desired frames accurately.
After the desired frame selected, please click “Cut” button on timeline to split/cut/divide the MTS/M2TS/TOD/MOD clip at a very precise point. Then highlight the clips you want to delete from the timeline, and click the “Delete” button next to the “Cut” button to remove the unwanted parts.

Part 2: Simple split video into many small clips with Pavtube Video Converter Ultimate.
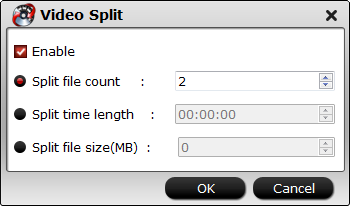
Pavtube Video Converter Ultimate (get Mac version) is a remarkable simple video splitter. With the program, you can split not only digital file formats with various different file formats but also commercial Blu-ray/DVD disc. The program offer 3 different way for you to split large video files into small equal parts: by file size, file count or time length to satisfy your different video splitting need.
Step by Step to Split Large Video Into Small Parts with Pavtube Video Converter Ultimate
Step 1: Import large video files.
Launch and start the program on your computer, click “File” > “Add Video/Audio” or “Add from Folder” to import source files to the program. For splitting Blu-ray or DVD disc, insert Blu-ray/DVD into DVD optical drive or external Blu-ray drive, then click “File” > “Loadf from Disc” option.

Step 2: Define output file format.
From “Format” bar drop-down list, select one of your desired file format to output. If you don’t want to loss any file quality, just select to output the same video as original file format.

Step 3: Split video into small parts.
By clicking the “Split” button under the file displaying list, checking “Enable” to enable it, and then you can split the file by file count, time length, or file size according to your own needs.

Step 3: Trim/Crop/Watermark video.
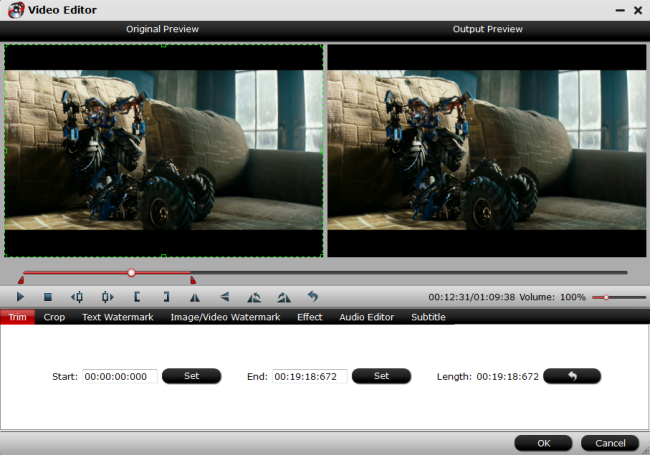
Select an item on the main interface to active the “Editor” function, then click the Edit icon on the tool bar of main interface to open the Editor Window, you can play and preview the original video and output effects. Also you can flip video, trim, crop, add effect, add watermark, apply special effect, etc.

Step 4: Start video splitting process.
Press the right-bottom “Convert” button to start the large video into small parts or segments splitting process.
When the video splitting is completed, you can find your converted files by clicking “Open output folder” with all splitted small files for convenient sharing, emailing and distributing.


