When we take the videos, for taking the perfect videos, we need to take the video from the different degrees. After the video recording, we all like to share the video is a happy thing, for better video playback, rotate a video is a necessary thing, you can rotate a video 90 degrees on Windows and share the perfect videos on Facebook, Youtube, Vimeo, etc. It’s easy to do, you can rotate the video with Windows Movie Marker, you also can adjust the video with the professional video to do, from the following introduction, you can choose one you want.
Solution 1: Rotate a Video 90 Degrees on Windows
For some Windows user, this way is easy to do, you don’t need other professional video editor, just use the Windows Movie Marker, which is a local video editor for Windows. We have made the comprehensive steps for you.
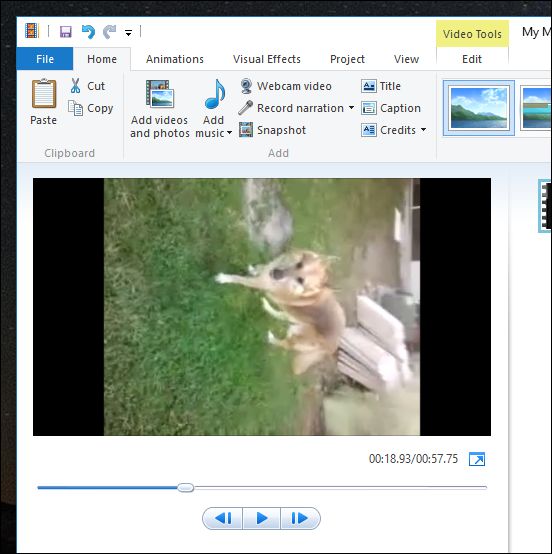
Step 1. After the Windows Movie Marker is done, open it and import the videos you want to rotate.

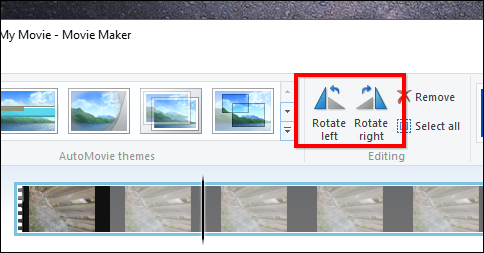
Step 2. On the Home ribbon, in the “Editing” section, you will see two buttons, “Rotate Left” and “Rotate Right”.
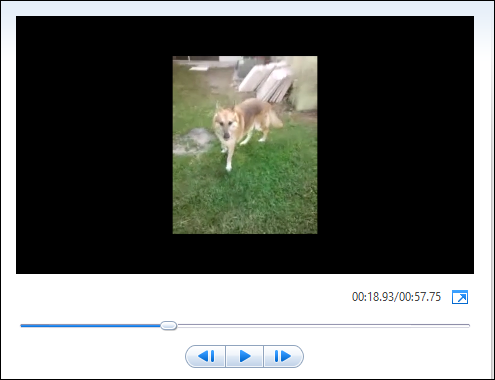
Step 3. Go ahead and click “Rotate Left” and note that our video is now oriented the correct way.

Step 4. Click on the “File” menu and select “Save movie”. You’ll be given a lot of settings to choose from.
Step 5. Your new movie file will be processed and saved in the location of your choosing. You can now view it correctly in your default video player.

Solution 2: Rotate a Video 90 Degrees on Windows
Pavtube Video Converter Ultimate for Window is another tool for rotating the videos which is also an excellent video editor, you can add any videos to it, like the common MP4, AVI, MOV, MKV, WMV, etc, whatever you take the videos with DJI, mobile phones, cameras, you all can load them to it, even you can load the DVD and Blu-ray disc, images to it. At the same time, you can get the multiple videos for uploading, sharing and playing, there are 300+ videos are listed in it.
With the built-in video editor, you not only can rotate the videos with 90 degrees, you also can rotate the videos with clockwise 90 degrees, anticlockwise 90 degrees, rotate the video to left and right, rotate the video up and down, etc, you can edit the videos by yourself: Cut the video into clips, trim the video, split the videos, you also can add subtitles to video, replace the music in video, etc. Refer to the following steps to rotate the video.
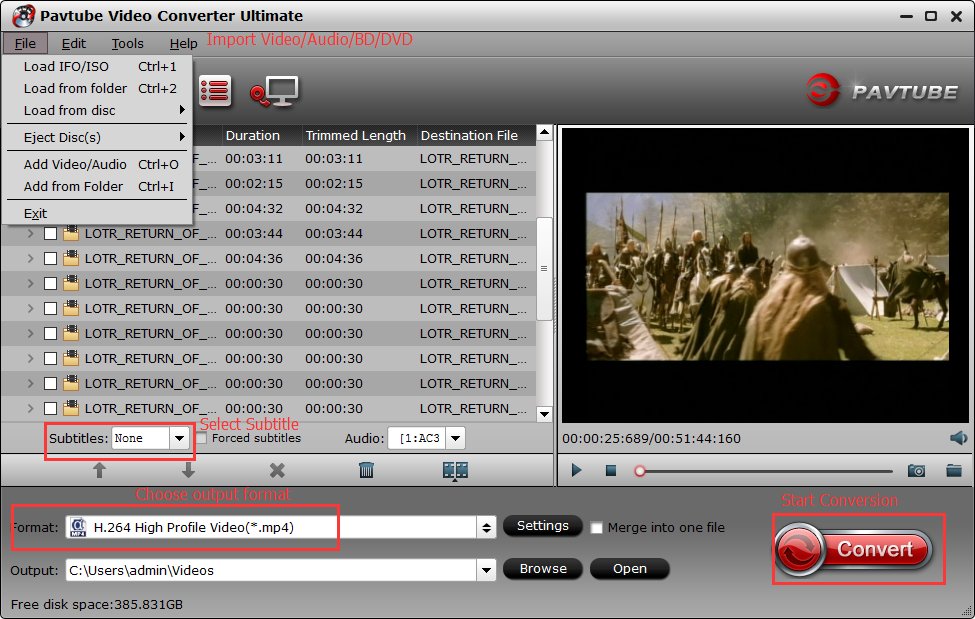
Step 1: When you start up the video converter and editor, the main interface pops up. You can click “Load file(s)” button or “Add video” button to import source files. You also can directly drag and drop the files you want to rotate to the software.

Step 2: Click “Format” bar, from its drop-down option, select one of your device playable file formats. Here, we chose to select one of the popular device compatible file formats “H.264 HD Video(*.mp4)” under “HD Video” main category. You also can choose the 3D videos which has the amazing 3D effect.

Step 3: Click “Edit”icon is grayed out . To activate the “Edit” menu, you have to select an item first. When a video file is selected, you can click the “Edit” icon
  on the tool bar of main interface to edit selected file. On the “Video Editor” Window, you can play and preview the original video and output effects. Also you can flip video, trim, rotate, and reset. Click to rotate the image 90°towards left or right.

Step 4: Then you can click “Convert” to start to convert and rotate video files. When the process ends, just open the output folder to locate the video.
Conclusion: Totally, you can choose any way to rotate the video, Windows Movie Marker is easy to use, the Pavtube Video Converter Ultimate can provide you more video editing features, especially when you fail to upload the videos to Facebook, Vimeo, etc due to the video incompatibility, you can convert the video to video in 1 minutes. Just enjoy the video.


