


Want an easy-to-use 3D video maker program to create or generate own cool 3D videos movies for impressive video watching experience? Whether you want to make home movies that will blow people away, or you want to create videos for your business that showcase your products from every angle, you need a 3D video maker program. But with so many different programs out there, how do you choose a program that’s right for you? Some are free, some are not. Some are hard to use, while others take just a moment to learn.
To help narrow down the choices that you can use 3D programs for videos – creating your own, editing an existing video, or developing animations. and this article will introduce top 3 3D video maker software for you to make extraordinary 3D videos and movies.
2016 Top Three 3D Video Makers Review
Top 1: Full Motion Video
This program allows you to edit, cut, and paste videos after the film is shot or you can do real time editing. It comes with special effects that you can add in if you wish. Other features include a video preview screen that lets you see your film’s final version as you go, removing any concerns about the final look. You can edit in either 2D or 3D with transitions, and also produce high definition videos. Once you have finished creating your masterpiece, you can share it right away on Facebook or Twitter, or to your Xbox 360 account. This is one of the programs with a trial version or you can upgrade to the full version for all of the features. 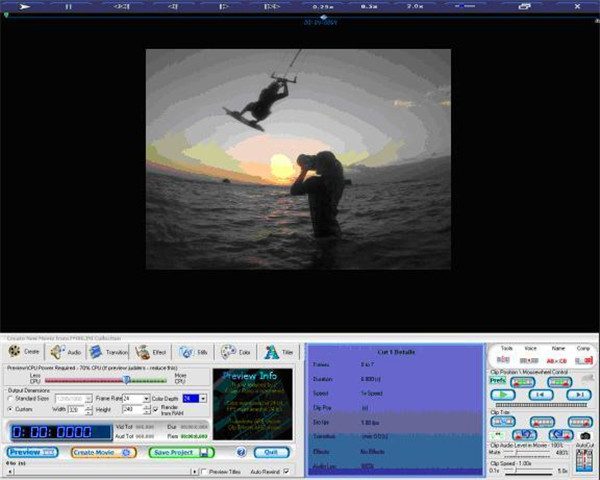
Top 2: Blender
This totally free program is also very versatile. You can load it on a number of OSs, including OS X and Linux, so you can take maximum advantage of the power of those machines. Not to fear, however, if you have a Windows machine – it will still work on Windows, too. You can create your own images using Sculpting and move that image using the Rigging feature. There’s also a content editor so you can add text to your videos. This particular program is not for the beginner, however. The depth of features is significant, and it is designed for experienced video creators. 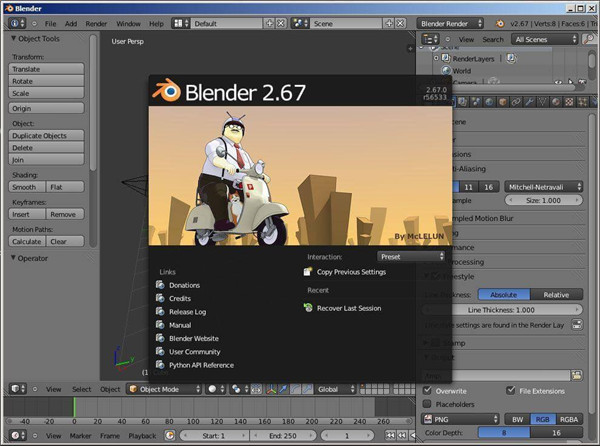
Top 3: Wax
This is another open source program that is a little more entry-level friendly. You can use it for your enhancing your own videos, or for creating advertising videos for your business. Wax comes with special effects built in such as lighting or shadow creation and transitions, and it gives you the ability to video compositing. Whether you want to use it for 2D or 3D videos, Wax can handle it. It adapts to be used in conjunction with other video editing programs like Adobe Premiere for those who are more advanced users. If you know how, you can use the graphics acceleration on your video card to do editing and add special effects in real time. 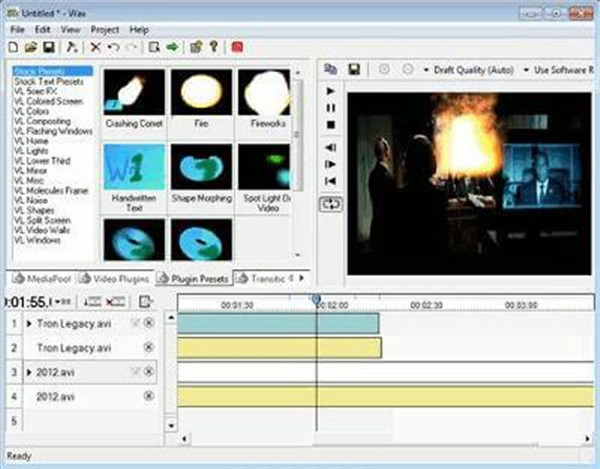
Best Fastest 3D Video Maker, Video Converter for Windows (10)
Pavtube Video Converter Ultimate/Pavtube iMedia Converter for Mac – review
• Create videos with photos and background music as MP4, AVI, MOV, H.265, FLV, etc. for playback on PC, Mac, iPhone, iPad, Android and other mobile devices or sharing onto YouTube, Facebook, Twitter, Instagram and more.
• Freely enjoy downloaded 8K/4K/HD/SD videos/movies from YouTube, Dailymotion, Vimeo and 300+ videos sites and convert them to MP4, AVI, WMV, MOV, etc. on Windows 10/8/7.
• Crop, trim and add subtitles for videos. Adjust video/audio parameters, aspect ratio, resolution, frame rate, bit rate and more.
• Apart from creating 3D movies, you can also use the program to adjust output 3D profile settings for getting better 3D visual effect. You can adjust 3D video depth or switch Left Right to change the display order the images in Side by Side 3D movie.
• The software you choose should give you the option to convert all kinds of 3D videos, or convert videos from common file formats like MKV, MP4, VOB, AVI, WMV and MOV as well as less-common file formats such as H.265/HEVC, XAVC, M2TS, M4V, DVD. The wider the range of potential conversions, the more useful a product will be to you.
For those who are still struggling to get top/bottom or side-by-side 3D to display correctly in 3D Projector/3D TV/Samsung Gear VR/Oculus Cinema/VR Headsets, the following tips maybe can figure you out.
Tip 1: You can download 3D movies for your 3D Projector/3D TV/Samsung Gear VR/Oculus Cinema/VR Headsets from 3D movies downloading site like forfree3d.com, 3dmoviesstreaming.com and 3D YouTube.
Tip 2: Actually, you can make 3D movies by yourself out of 3D Blu-ray, 2D Blu-ray/DVD, even local 2D movie library with 3D Movie Creator like – Pavtube Video Converter Ultimate. This 3D movie maker can convert all 3D movies in whatever format such as 3D YouTube, 3D Blu-ray to 3D MP4/MKV for 3D Projector/3D TV/Samsung Gear VR/Oculus Cinema/VR Headsets so that you can watch your own 3D movies. Besides 3D movies, it also can transcode 2D Blu-ray, DVD, MKV video and other normal format videos with suitable 3D format.
Mac users can use the Mac version, it can help you convert your own 3D videos and movies on Mac OS X El Capitan.
Free Download Best 3D Movies Maker: 

Other Download:
– Pavtube old official address: http://www.pavtube.cn/blu-ray-video-converter-ultimate/
– Cnet Download: http://download.cnet.com/Pavtube-Video-Converter-Ultimate/3000-2194_4-75938564.html
How to transcode your own 3D videos and Movies for Playback?
Step 1: Add 3D movies
Launch 3D Movies Converter. Click “Add video” button to add local 3D movies. This software supports batch conversion so you can add more one 3D movies at the same time. 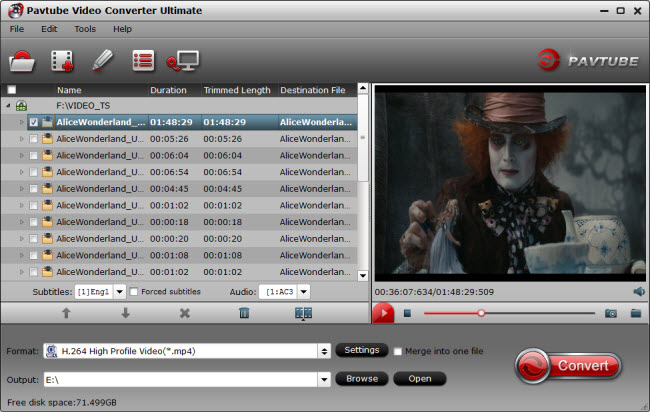
Step 2: Choose right format
Gear VR supports MP4, MKVI, etc format. You can click the “Format” bar and choose “MP4 Side-by-Side 3D Video (*.mp4)” or “MKV Side-by-Side 3D Video (*.mkv)” from “3D Video” profile list for your 3D Projector/3D TV/Samsung Gear VR/Oculus Cinema/VR Headsets. 
Step 3: Start Transcoding process
Click “Convert” button on the right to start transcoding local 3D videos and movies. After the process, just open the output folder to locate the created 3D movies.
Now, you can play you created 3D videos and movies as the aforementioned steps via your 3D Projector/3D TV/Samsung Gear VR/Oculus Cinema/VR Headsets etc . Just enjoy your 3D Videos on 3D movies!
Another Choice – How to Make a 3D Video – From eHow
3D image by Eagle from Fotolia.com
Films shot in 3D, also known as stereoscopic cinematography, are becoming ever more common and provide a unique viewing experience by making the subjects of the film appear to be three-dimensional. This technology takes advantage of the fact that we have two eyes and uses dual cameras to mimic what our eyes would see. Special 3D glasses are required to realize the 3D effect. Making 3D videos is not as complex as you might think, and with some basic equipment you can soon be producing your own low budget 3D films.
Shooting the Video
Get two video cameras, preferably of the same make and model. Make sure the two cameras are shooting at the same frame rate by checking the fps in the camera’s menu settings.
Mount the two cameras side by side on the same plane. The center of the lenses should be about 2.5 inches apart, which is the distance between our two eyes. You will need to build a special rig for this as tripods are made to support only one camera and you cannot get two tripods close enough together. You can do this by mounting two 3/8 bolts into a small piece of wood and screwing them into the tripod mounts on the bottom of the camera. You can then securely tape the piece of wood onto the top of the tripod.
Shoot the video with both cameras running simultaneously.
Editing the Video
Capture the footage from both cameras into a video editing program such as Final Cut Pro, Adobe Premiere or Sony Vegas Pro.
Drop the footage from the left camera into the bottom video track in your time line and the footage from the right camera into the top track.
Desaturate both of the clips, which will make them black and white. In Final Cut Pro, go to the effects tab and click on “Video Filters” > “Image Controls,” then drag the Desaturate tool onto your clips.
Add the RGB balance effect to both clips. To do this in Final Cut Pro you would go to “video effects,” click “color balance” then drag the RGB balance effect onto your clips. RGB stands for red, green and blue. Adjust the settings on the RGB balance effects tools so that the red in the right video, which is the top track, is turned all the way down and the cyan in the left video, which is the bottom track, is turned all the way down.
Source:http://www.ehow.com/how_7491953_make-3d-video.html
Top 3 3D Video Makers to Make 3D Videos Movies on Windows 10/Mac (masOS High Sierra)
Aug 31, 2016 09:31 am / Posted by John Salley to Final Cut Studio, Reviews, Windows Movie Maker


