


MakeMKV is one of my most used DVD and Bluray ripping tools. It’s not free, but you can get a 30-day free trial to give it a try. It won’t place a watermark on your ripped media either. So there’s no reason to not give it a try. This is a software for ripping Bluray discs and is able to break much of the encryption that DVD Decrypter is unable to. Below will gives you the detailed steps on using MakeMKV. If you have already tried this software, and want an alternative, just read on to get answer.
Step By Step to Use MakeMKV
Step 1. Once you open MakeMKV and install the Bluray the software will load the disc.
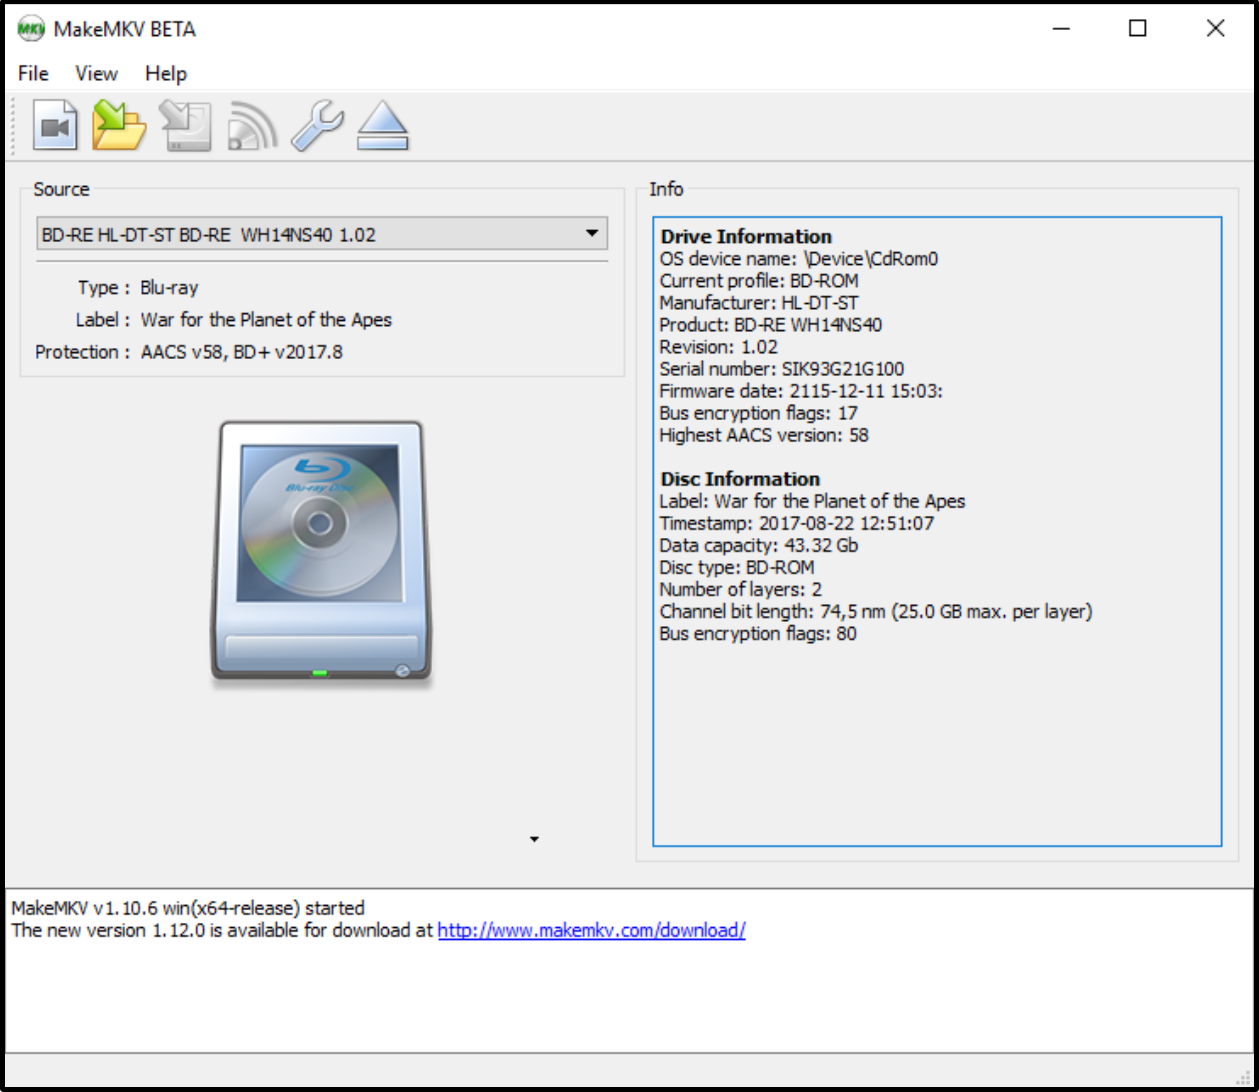
MakeMKV will often know the title of the Bluray disc in its tray when you open the software (Pic 1).
Step 2. Click on the DVD player icon in the middle of the screen. The software then scans the disc to find out how many titles are on it as well as audio and subtitle tracks.
![]()
This allows the software to determine how many titles are on the disc as well as which audio and subtitle tracks are available for each subtitle (Pic 2).
Step 3. Once the scan is complete you’ll see how many titles are on the disc. The Titles with the highest number of chapter and the largest in size are most likely the movie that you wish to rip. The software will check all of the titles by default. You can unselect all of them by placing your mouse over one of the boxes and doing a right click. A box will appear. Just select "Unselect all" and then click on the videos you wish to keep.
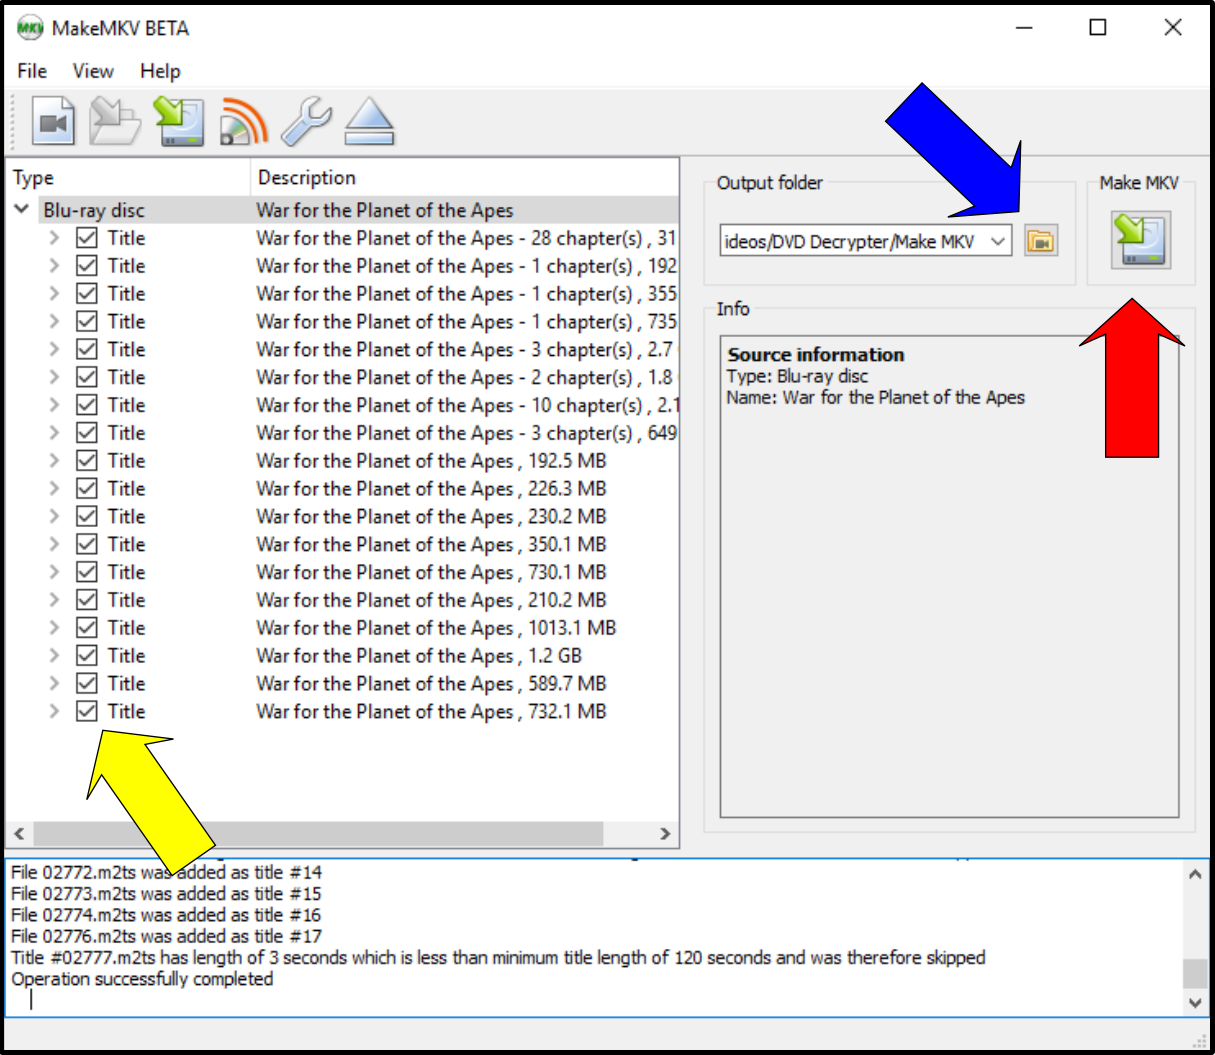
It will place a checkmark by each title on the disc by default (Pic 3).
Step 4. Expand the title you wish to rip and ensure that the audio and subtitle tracks are selected. You’ll want to check the subtitle’s in this section because movies will often contain subtitles now to show locations or when someone is speaking in a foreign language.
*note: Unlike a DVD rip and conversion with Handbrake where you select "Foreign Audio Scan" where ‘Forced Subtitles’ are used to translate foreign languages, Bluray discs will use a mildly different system. Screenshots showing examples at the end of the article.
To change the location of where to save the video, click on the file folder (Blue Arrow in Pic 3). You can also have a ‘default’ location saved in the in the setting (Wrench at top of the screen of Pic 3).
Step 5. Click on the MakeMKV DVD Player icon in the top right corner (Where the red arrow is pointing in Pic 4) and the movie will begin ripping.
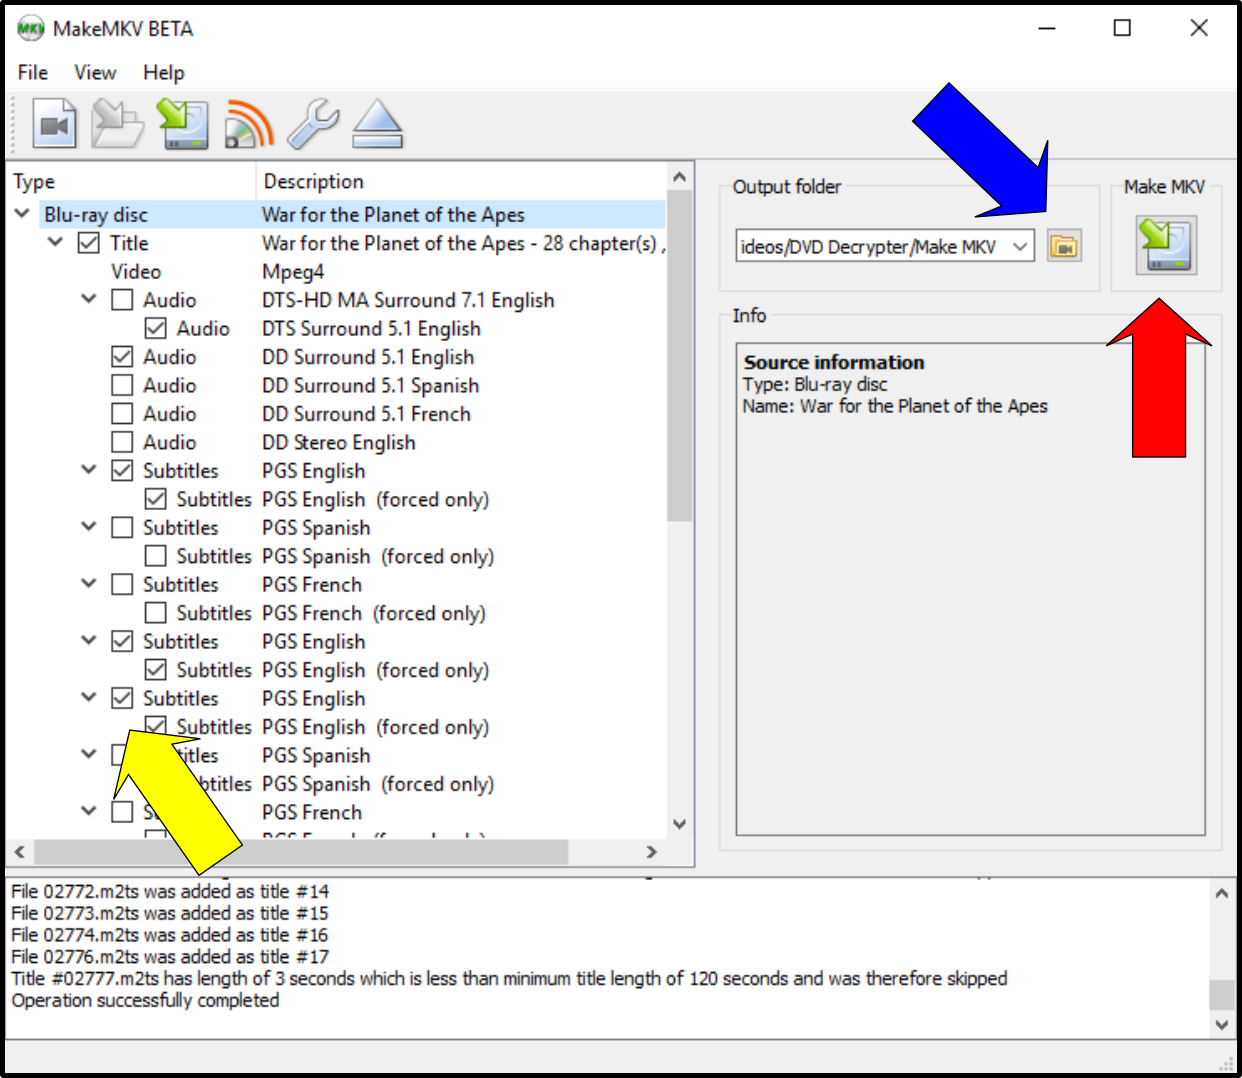
Expanding the title will allow you to pick which audio and subtitle tracks Pic 4)
Step 6. Let it rip, and wait for a while.
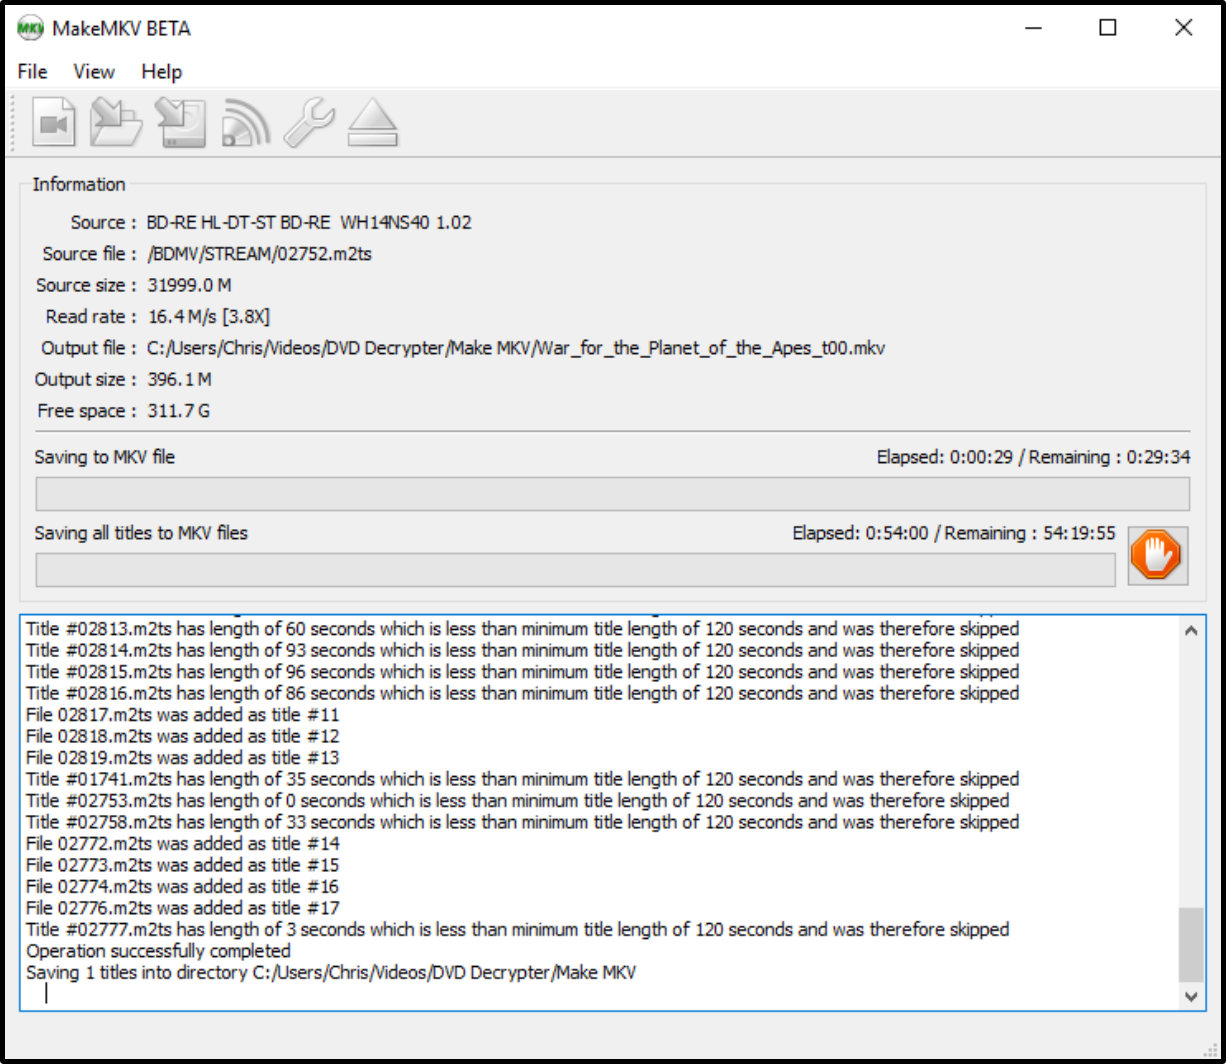
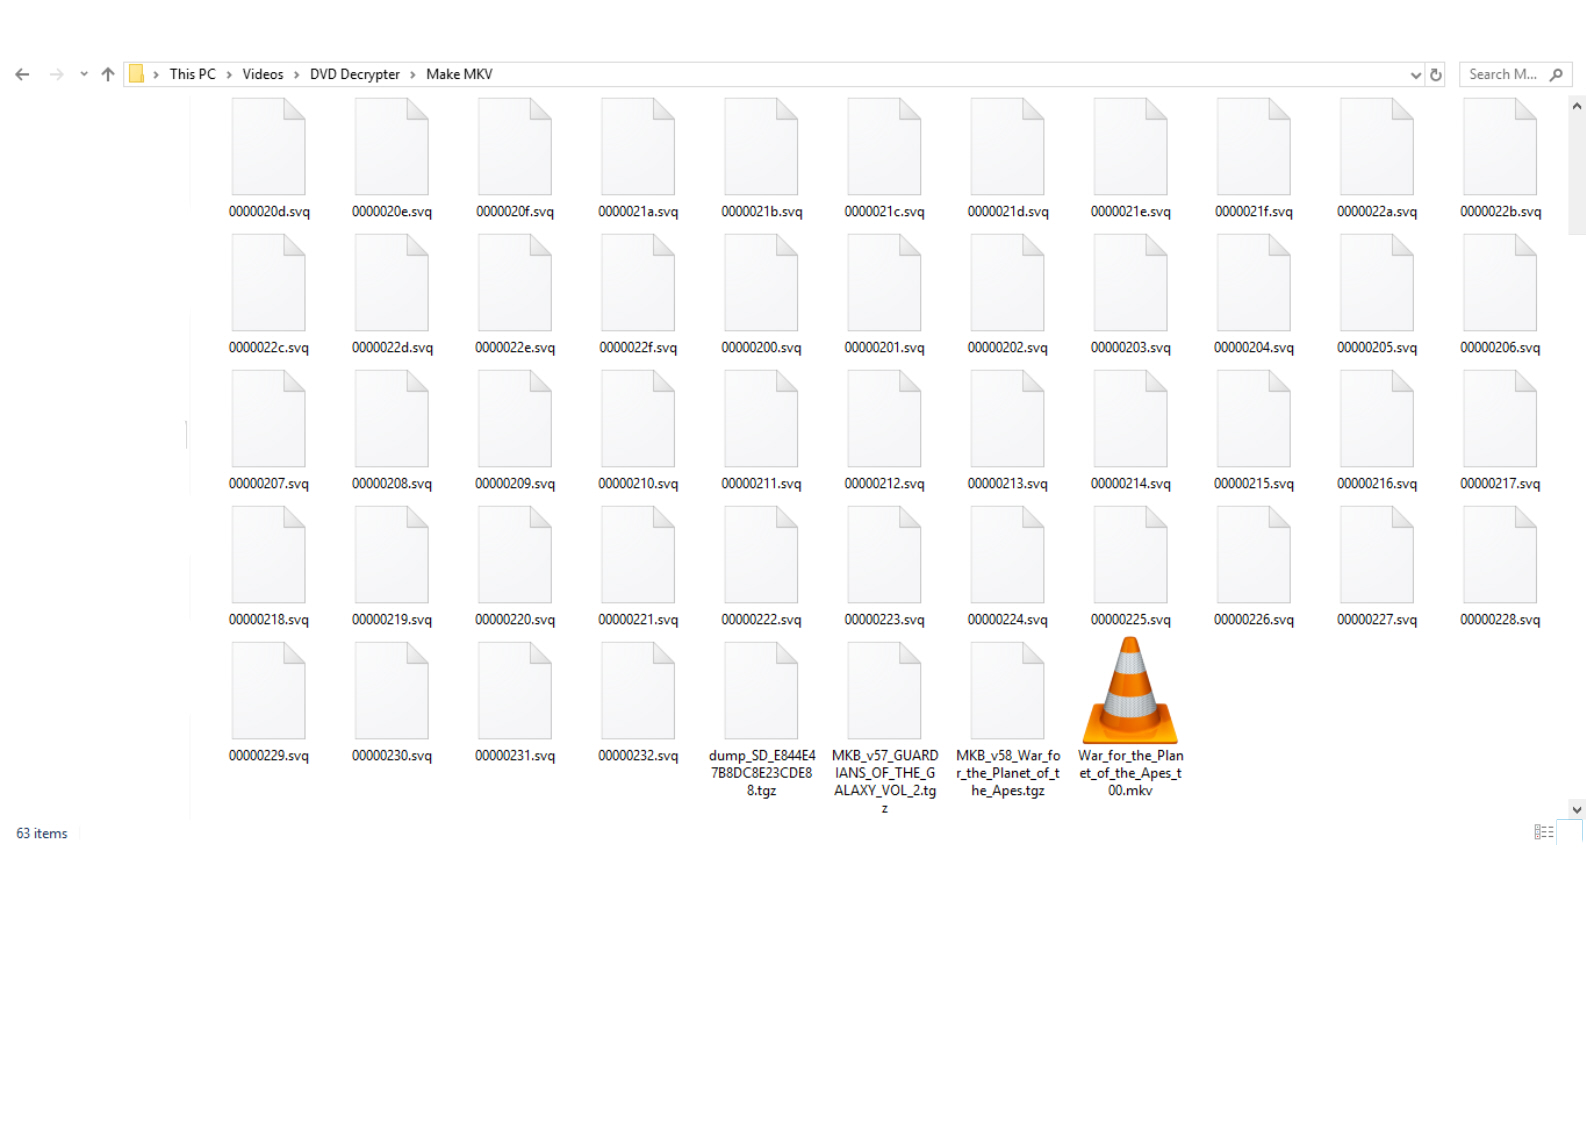
Step 7. Once the video is finished being ripped, you’ll get a notification. Just click OK and you are done. When you open the file where the video was saved you’ll see several logs from when MakeMKV ripping process. You can just delete these.
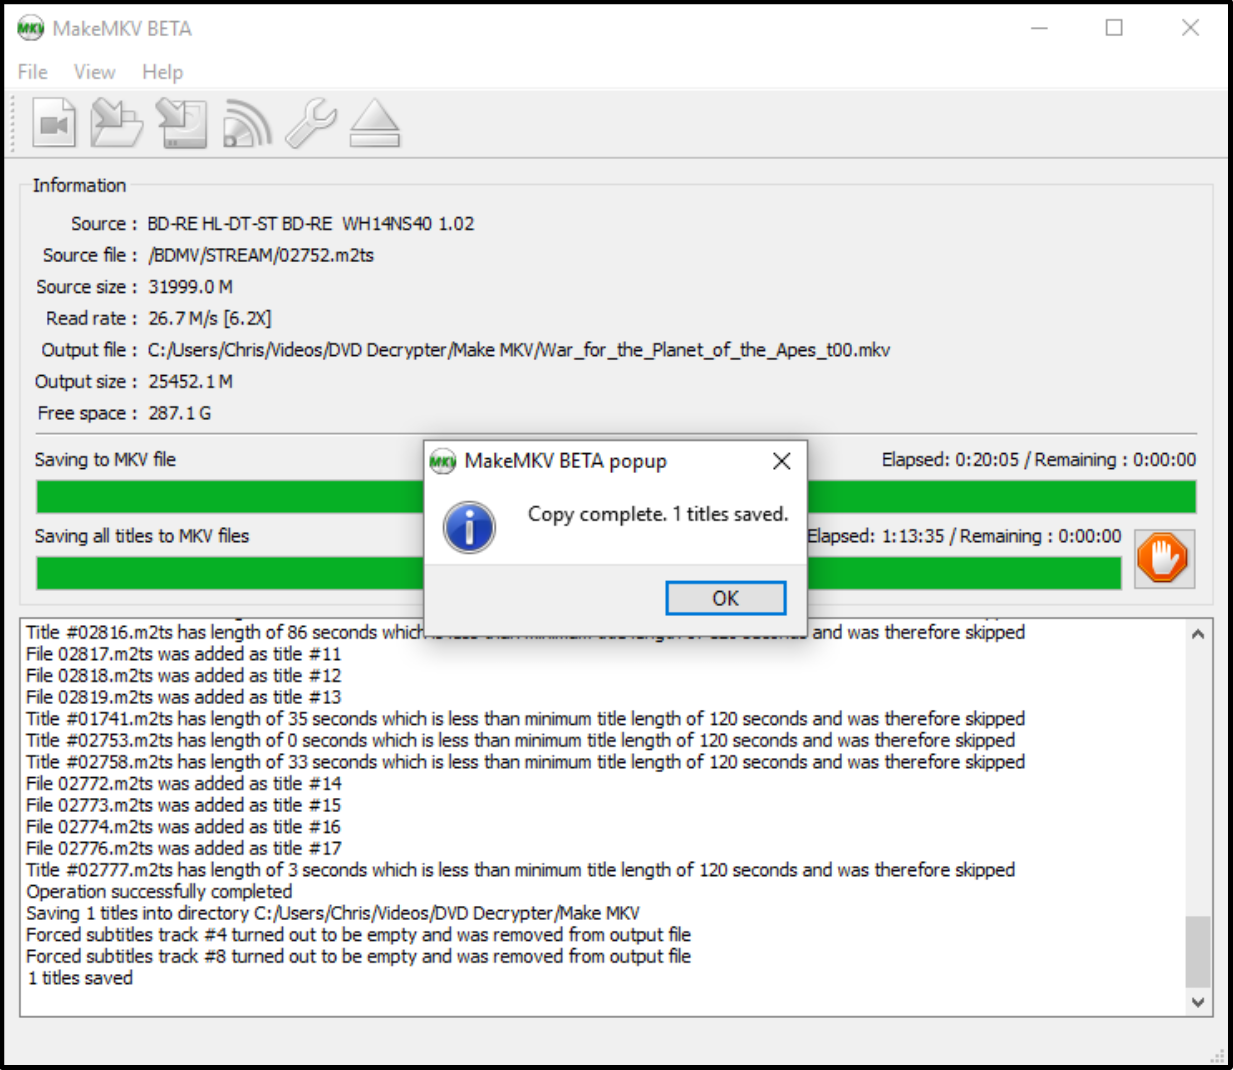
You’ll be notified once the video has been ripped.
Best MakeMKV Alternatives for You
Even though MakeMKV is easy to use, more and more people are searching for the MakeMKV alternative which can be more powerful than MakeMKV and make up above flaws. Why not try Pavtube ByteCopy | for Mac, a god-given Blu-ray ripper, converter, Blu-ray copy software, of course, it’s the best MakeMKV alternative. You can get the best and comprehensive Blu-ray service at here, like these:
- Comprehensive disc input: Support the Blu-ray disc, Blu-ray ISO image, Blu-ray folder, DVD disc, images, folder can be supported too.
- 3 Ways to lossless backup Blu-ray: Copy full BLu-ray disc, copy Blu-ray main title, get digital Blu-ray movies freely
- Multiple output video formats: Bytecopy provides 200+ video formats for you, like: MP4, MOV, AVI, FLV, MPEG, etc.
- Perfect 4K video and 3D converter: With this software, you can get 4K video form common Blu-ray disc or 4K Blu-ray disc, convert common 2D Blu-ray to 3D videos.
- Remux Blu-ray easily: Surprise, this software can remux Blu-ray to MKV, AVI, MP4, etc. You also can Remux DVD.
- Built-in video editor: With built-in video editor, you can edit the video and choose some clips for sharing on Youtube, Facebook, Vimeo, tec.
More features are waiting for you explore, we only have listed some main functions for you. Below will teach you to master this wonderful MakeMKV alternative within 3 minutes.
Master The Best MakeMKV Alternative Within 3 Minutes
Step 1. Get the software and load DVD/Blu-ray disc
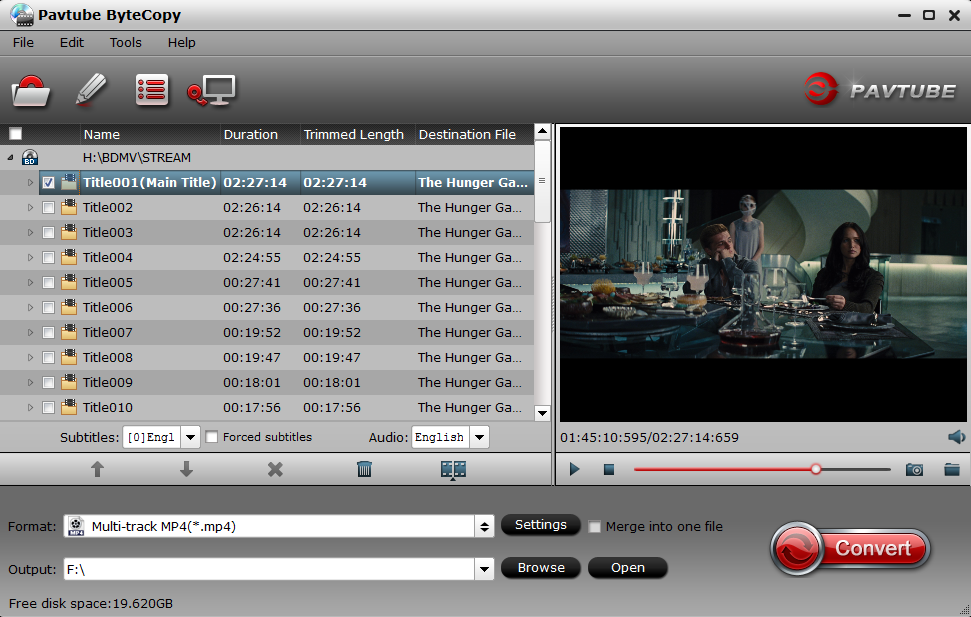
Download this software, and open it with double-click, you can click “File” >”Load from disc” to load Blu-ray disc. You can also drag the Blu-ray/DVD movie to the left window quickly. You can preview the video at the rght window.
Step 2. Choose output video format
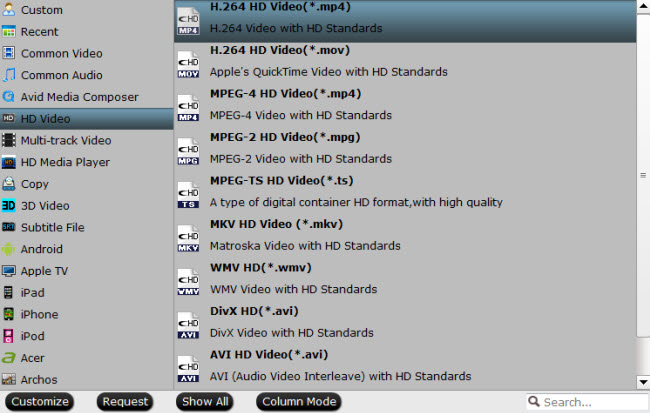
Click Format button and open the output video list, you can find 200+ video formats at here, like: MP4, MKV, AVI, etc. You can choose any video formats you need, if you don’t know how to choose, you can refer to the following suggestions:
- Best Option: Choose multi-track lossless MKV video, which keeps the Blu-ray multiple subtitles, audio tracks and chapters.
- Popular Option: Choosing MP4 video which can be supported by most media players, portable devices, NLE software, etc.
- Other Options: You also can choose the device for Blu-ray movies, such as: PS4 Pro, Xbox One, Wii U, etc. If you want to edit the video, you can choose NLE software, like: FCP,Windows Movie Maker, Sony Vegas Pro 13, iMovie, etc.
If necessary, you can click the Setting button and adjust the video related parametrs, for example: You can adjust the audio channels for keeping Blu-ray Dolby 5.1 and Dolby TrueHD 7.1 Audio, you also can adjust the video resolution, upscale common Blu-ray movie to 4K video, other factors: Video frame, video bitrate, video and audio codec, etc, you can change them too by your own need.
Step 3. Start video conversion
You can choose any video formats, adjust the video, edit the video, after these tasks, don’t forget save the settings and go back to the main interface, press the Convert button, this software will finish the magic process. Wait for a while, you can get the video files which satisfys your needs.
Related Articles
Any Product-related questions?support@pavtube.com