


Why resolution change in Handbrake with “keep aspect ratio” checked?
“I’m converting most of my DVDs to digital files, and I don’t understand why when I see source showing “720 x 480”, and I have “Keep Aspect Ratio” checked, the size on every movie changes; primarily the height changes from movie to movie. Is this cropping detecting that the movie height isn’t really 480?”
Solution to fix Handbrake Aspect Ratio Distored Problem when ripping DVD
Solution 1: Change Anamorphic setting
Change your settings from “Anamorphic: None” to “Anamorphic: Strict”. Then the output video will strictly follow with the original file size.
Solution 2: Manually set frame size as original
When encoding from DVD or a VIDEO_TS folder, Handbrake would spot the mismatch (2.37:1 stream vs. 1.78:1 container) and would defer to the container’s setting. If you use “Anamorphic: None”, disable “Keep Aspect Ratio” (since the reported PAR is wrong) and manually set the frame size to 720×480.
Solution 3: Use a Handbrake alternative
If above listed solutions won’t solve your problem, we highly recommend you to try Handbrake best alternative – Pavtube ByteCopy. The program can assist you to powerfully bypass all DVD copy protection and then rip unencrypted DVD to various common digital file formats such as AVI, WMV, MP4, MOV, FLV, 3GP, etc without aspect ratio distoring issue. Moreover, you can also use the program to adjust output video aspect ratio to let it adapt with the devices that you plan to play ripped DVD movies with.
Related article: Install Handbrake Libdvdcss to Rip DVD | Best Handbrake Video Quality Settings | Handbrake for macOS Sierra
For Mac users, you can switch to download Pavtube ByteCopy for Mac to perform the conversion on macOS High Sierra, macOS Sierra, Mac OS X El Capitan, Mac OS X Yosemite, etc.


Step by Step to Fix DVD Aspect Ratio Distored with Handbrake Alternative
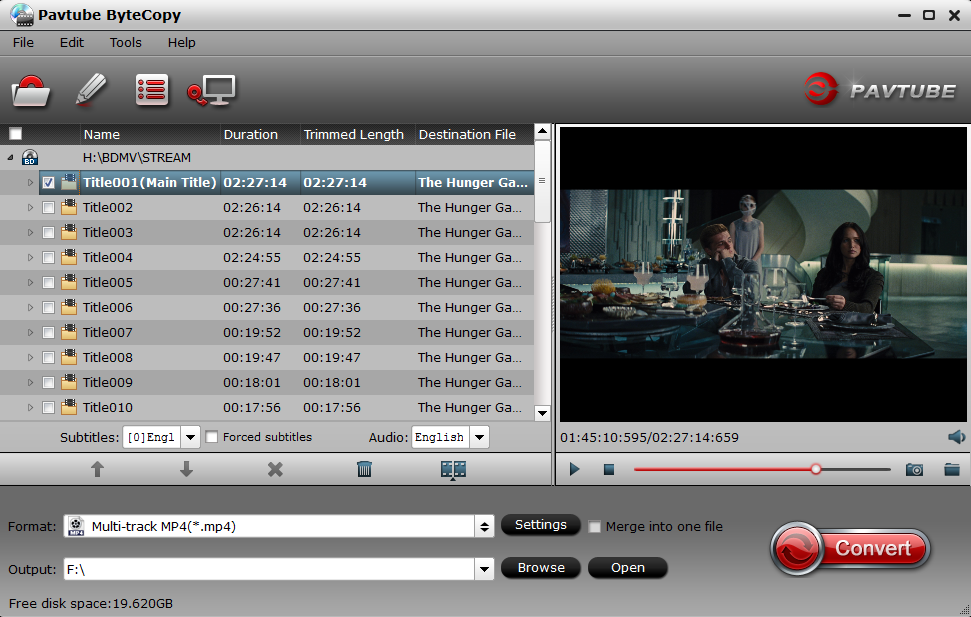
Step 1: Load DVD movies.
Download, install and run this DVD ripper. You can load DVD by clicking “File” > “Load from disc”. Or load DVD Folder by clicking “File” > “Load from folder” or load DVD IFO/ISO image by clicking “File” > “Load IFO/ISO”.
Step 2: Define the output format.
Clicking the Format bar, from its drop-down list, select one of your desired output file format such as “H.264 HD Video(*.mp4)” under “HD Video” main category.

Step 3: Adjust output profile settings.
Click “Settings” on the main interface to open “Profile Settings” window, here, you can flexibly choose or specify exactly the profile parameters including video codec, resolution, bit rate, frame rate, audio codec, bit rate, sample rate, channels, etc as you like to get better output video and audio quality.

Step 4: Adjust output video aspect ratio.
Go the “Crop” tab in the “Video Editor” Window, switch to the “Advanced Mode”. To change output video aspect ratio, there are several aspect ratios for you to choose from, including 16:10, 16:9, 5:4, 4:3, 3:2, and 2:1. Once you select a “Display aspect ratio”, the “green crop frame” will keep this ratio to crop video and you are able to preview the final effect in real time. If you want to keep the same aspect ratio in your final output files, do remember to set the Video “Size (pix)” in “Settings” section as the same ratio as display aspect ratio.

Step 5: Begin the final conversion process.
After all setting is completed, hit the “Convert” button at the right bottom of the main interface to begin the conversion process from DVD to your desired digital file formats conversion process.
When the conversion is finished, click “Open Output Folder” icon on the main interface to open the folder with generated files.


