iMovie is an intelligent design, there have not many instructive guidelines for users, which make troubles for the users who don’t have much time to find out hidden and useful tips and tricks. Adding video effects is one of the key editing functionalities that come with iMovie. The program offers a wide variety of effects that you can use to make your videos sparkling. You can resize and crop video in iMovie 13 projects to remove undesirable parts or to get a close-up of a subject of interest. You can also use cropping to make image fit if you have video clips that don’t fit within your project’s aspect ratio.
Here, this article will discuss the top 5 for your information. Set the right tone and mood of your movie with any of the following unique effects, taken with your camera held sideways, you can use rotating feature for reorienting images.
Hot Search: Blu-ray to iMovie on Mac | Video Format Supported by iMovie | YouTube Video to iMovie | iPhone Videos to iMovie |
Part 1: How to crop and rotate photos and videos in iMovie
Sometimes you shoot videos or take photos only to find it’s vertically oriented. When you are editing those photos and videos in iMovie, you want to rotate photos and movies in iMovie. And there are also many times when you want just a certain part of a photo or video either to focus on a certain part or to remove the imperfect part, and you need to crop photos and videos in iMovie. 
Step 1. Open the tools
Open your iMovie project first and open the cropping and rotating tools. Hit the Crop button on the iMovie toolbar to open the Cropping Tools in the viewer. 
Step 2. Crop photos and videos
In the cropping tools viewer, simply drag to resize and reposition the green area to focus on a certain part. Then move the pointer to a corner of it until the pointer turns into a plus sign, and then drag to make it bigger or smaller so as to change the size.
Tip: You can hit Allow Black to maintain a black border around your still photo. This function applied only to still photos. 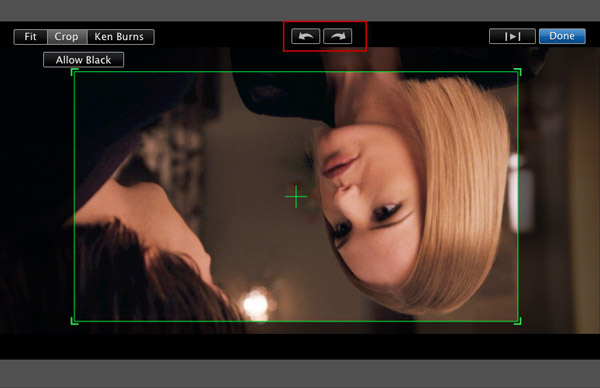
Step 3. Rotate photos and videos
Hit the Rotate button to rotate your videos and photos to the left or right. Each click turns your image 90 degrees.
Note: With the new orientation, the image might no longer fit the project’s aspect ratio, and black bars might appear at the top and bottom of the image (letterbox) or on its left and right sides (pillarbox). 
Step 4. Preview and Save
Click the Play button in the viewer to preview the photo and video. When you’re satisfied result, simply click Done to finish rotating photos and videos or cropping photos and videos in iMovie.
Part 2: How to Crop and Rotate Videos using iMovie Alternative – From Pavtube
You can use Pavtube iMedia Converter for Mac as an easy-to-use iMovie alternative to crop and rotate video clips on Mac OS Sierra.
Free Download and trail: 

Other Download:
– Pavtube old official address: http://www.pavtube.cn/imedia-converter-mac/
– Cnet Download: http://download.cnet.com/Pavtube-iMedia-Converter/3000-2194_4-76177788.html
Just follow the steps below to simply crop and rotate videos in iMedia Converter for Mac.
Crop a video clip:
1. Open up iMedia Converter for Mac program, directly drag and drop your video clips into it.
2. Check the video clip you want to crop, and then press the Edit button to enter Video Editor Panel. 
3. Switch to “Crop” tab, and follow the below methods to crop selected video:
A. Crop video by dragging and dropping the green cropping rectangle
Adjust the green cropping rectangle by dragging its corners or edges to show the part of the image you want. 
B. Crop video by setting values
There are “Simple Mode” and “Advanced Mode” under Crop feature. In “Simple Mode”, you can customize values in the box of “Left”, “Top” and “Crop Size” to make your crop decision. 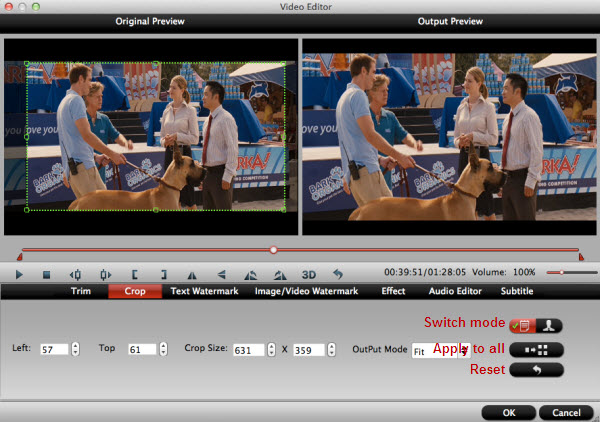
Under “Advanced Mode”, there are four value fields: Left, Top, Width and Height. You can either type in specific values to the fields or adjust sliders to crop the source file. 
Keep original aspect ratio and cropped aspect ratio
To keep original aspect ratio, users need to make sure the “Display aspect ratio” and the “Size (pix)” in “Settings” option are all set as “Original”. If you want to keep the cropped aspect ratio, Pavtube software offers several aspect ratios for you to choose from, including 16:10, 16:9, 5:4, 4:3, 3:2, and 2:1. 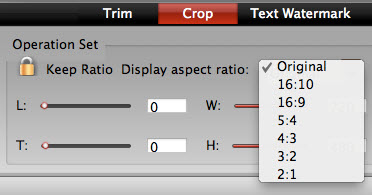
Once you selected a “Display aspect ratio”, the “green cropping rectangle” will keep this ratio to crop video and you are able to preview the final effect in real time. If you want to keep the same aspect ratio in your final output files, do remember to set the Video “Size (pix)” in “Settings” section as the same ratio as display aspect ratio. For example, if you want to export a file with “16:9” aspect ratio, firstly, you choose “16:9” in “Display aspect ratio”, and then go to “Settings” section to adjust the Video “Size(pix)” as 1280×720 or 1920×1080. After finished, click “OK” to confirm. 
Rotate a video clip:
1. Open up iMedia Converter for Mac program, directly drag and drop your video clips into it.
2. Check the video clip you want to rotate, and then press the Edit button ![]() to enter Video Editor Panel. 3. Press Flip or Rotate buttons on Video Editor Panel to rotate a video clip. There are four options to help you rotate a video.
to enter Video Editor Panel. 3. Press Flip or Rotate buttons on Video Editor Panel to rotate a video clip. There are four options to help you rotate a video. 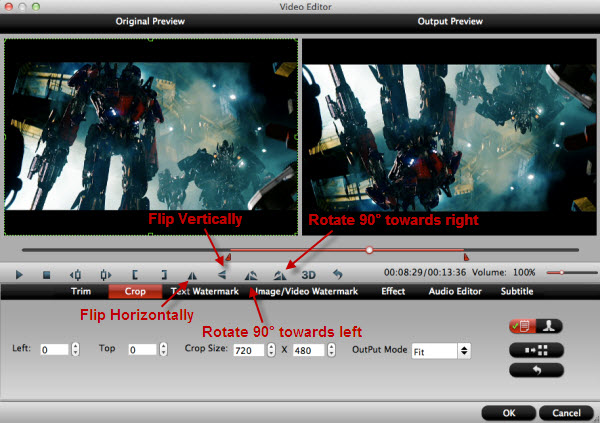
Flip Horizontally: Click to flip the image horizontally.
Flip Vertically: Click to flip the image vertically.
Rotate 90° towards left: Rotate clip 90 degrees counter-clockwise.
Rotate 90° towards right: Rotate clip 90 degrees clockwise.
When you’re satisfied with the image, click OK, and then go back to the main interface of iMedia Converter for Mac to press Convert button  to start conversion. The cropping and rotating effects will be applied to the output files.
Part 3: Top 5 iMovie Effects You May Not Know
1. External Microphones 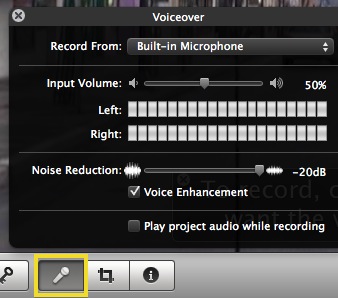
A great movie is the one with the best quality sound. That is the sole intention of having this iMovie effect to differentiate between professional movies from amateurs. You will find out that the audio captured by cameras for movie is always of poor quality and you will require boosting that for your movie to look good. External microphones effect is used to accomplish that since without a good audio, very few people will appreciate your movie.
2. Steadycam 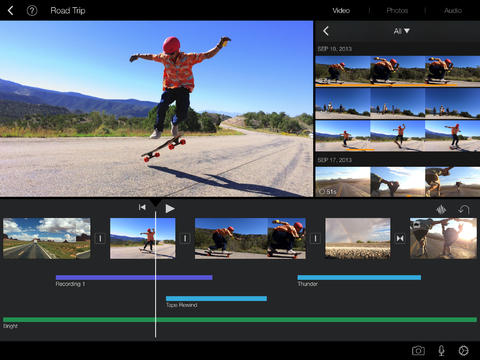
The main intention of this effect is achieving steady shots which make the movie more professional. It has some limitations but that does not carry away all the glamour in using it with iMovie to give it a professional touch. The main benefit of this effect is ability to track subjects every place they go to. You can get some expensive as well as cheap steadycams but it will all depend on the needs you want to satisfy. It is good for smoothing shaky shots in a movie.
3. Built-in Effects 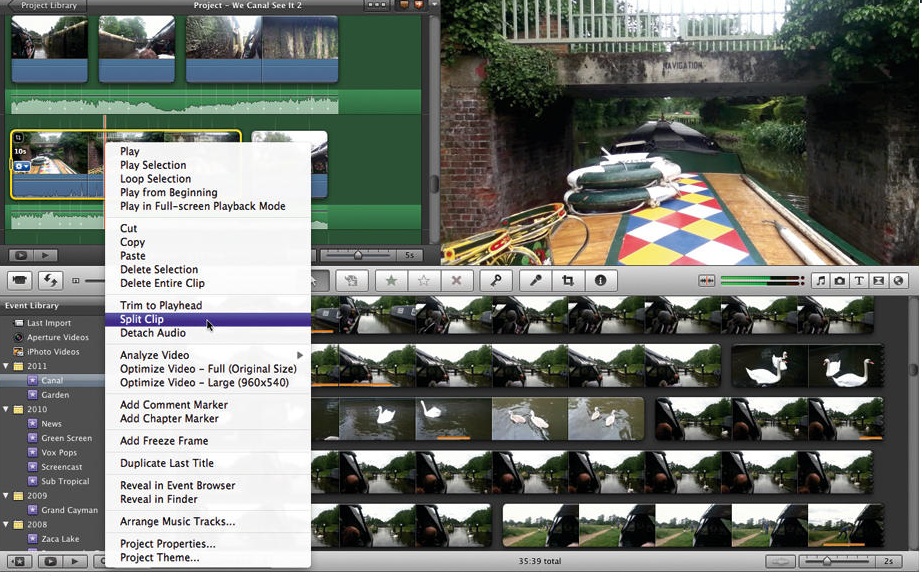
Most of the footage captured by cameras is always in the right proportion in relation to color, brightness and contrast. However, that can change when editing begins and iMovie will come in handy at such a point. There are many built-in effects for iMovie like transition which you will be able to use and progressively alter the video quality as per your expectations.
4. Cut in time to music 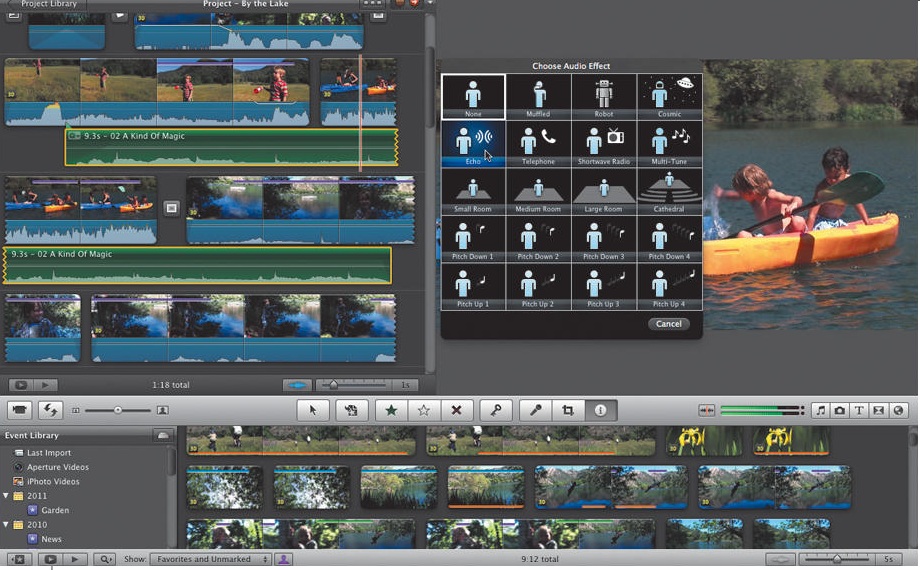
This is an effect for coming up with the right opening sequence for your movie. You cannot downplay the significance of music in any movie production thus this effect must be a top consideration for you all the time. When used at the opening of a movie scene, music will help to create the right mood and tone as well as even make viewers more interested in watching it to the end. You should be in a position of replicating this effect on your movie once you have iMovie in your possession.
5. Split Edit 
This effect is used to synchronize audio with two clips that have been cut separately and joined together. When used in iMovie, split edit effect helps to enhance the quality of shots and comes with high flexibility. You get to make a choice of the exact audio for your prevailing situation. With a professional editing set like iMovie, you will have it easy in achieving split edit which does not include long processes.


